Showing posts with label nut. Show all posts

Sunday, September 22, 2013

Moving Cookies

I haven't disappeared, but I have been without internet for a few weeks.  Anyway, here's a post I started in the midst of moving.  Far too many things have crossed my mind since I set out to make these, but details don't really matter when you add peanut butter and chocolate chips to a thick and chewy oatmeal raisin cookie, do they?  I'm mostly unpacked and settled in now, but the following paragraphs are a taste of what I was up to when I should have been packing.......

Moving cookies. These are moving cookies. Otherwise known as Melissa has way to many things to be doing/packing/finishing up etc. but can't concentrate on any of them so she just ends up making cookies. Yeah, those kind of cookies.


Our first red flag is cookie justification.  Oh I could take a break and make cookies to give to people who are helping me pack and move. Thank you cookies. Goodbye cookies. Besides, I do have a recipe that needs testing and tweaking. 
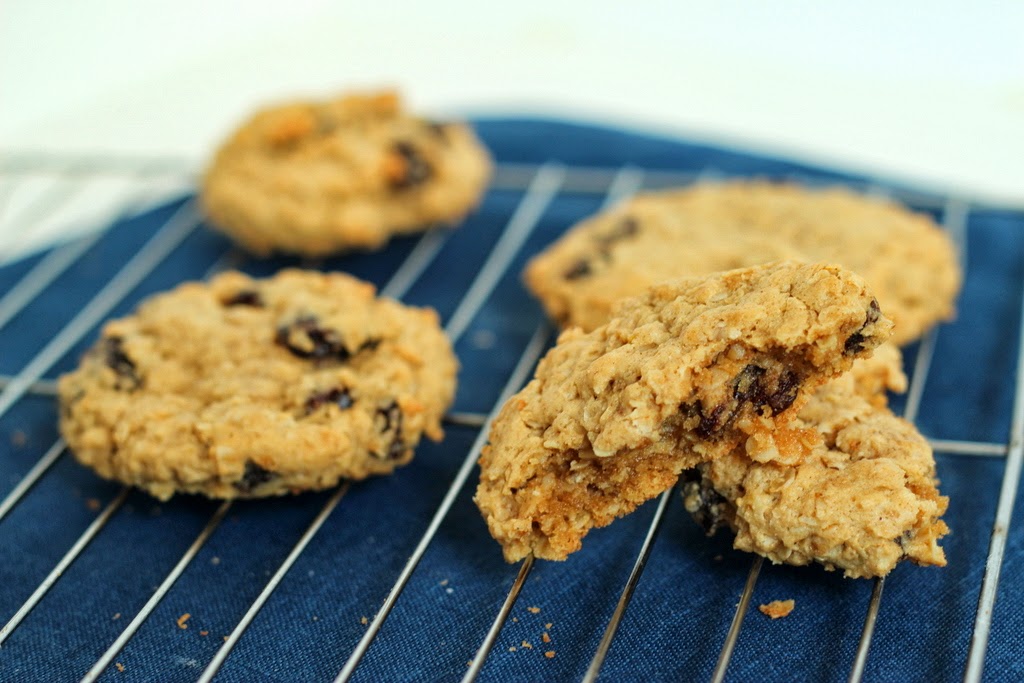

The first few minutes of measuring and mixing are indeed a therapeutic zone-out to avoid the task at hand.  But then comes the dough.  Stress eating half a batch of dough and then barely having enough cookies left to give your helpers only heightens the tension and anxiety inside.  But it happens.   Happened.   More than once.   Ugh, will I ever learn?   Note to self: open jars of peanut butter and half-empty bags of chocolate chips are not helpful, especially after all that cookie dough.


It almost seems like an insult to exchange cookies for moving help, these don't come close to repaying all the help I've received.  THANK YOU to all the patient, strong, hard-working helpers.  I wish I had words to express how much I appreciate you.  I just don't know how to thank you, and so by default I make cookies.

Moving Cookies
recipe inspired and adapted from a conglomeration of too many things for me to tell you about right now

Ingredients:
1/2 cup butter, softened
1/2 cup creamy peanut butter
3/4 cup packed brown sugar
1/2 cup granulated sugar
2 large eggs
1 tsp vanilla
1-1/2 cups all-purpose flour
1 tsp baking soda
1/2 tsp salt
1/2 tsp cinnamon
2-1/2 cups uncooked quick-oats
1 cup raisins
1 cup chocolate chips
1/2 cup chopped walnuts

Instructions: (Danger! Do not proceed under stressful situations, you will just eat too much dough. Rapid and mindless consumption of dough, leftover ingredients and warm cookies will not help in the long run.)
* Preheat oven to 350 degrees F.
* In a large bowl cream together butter, peanut butter, brown sugar and granulated sugar with an electric mixer until light and fluffy. Beat in eggs and vanilla.
* In a small bowl combine flour, baking soda, salt and cinnamon; stir into wet ingredients.  Mix in oats.  Add raisins, chocolate chips and walnuts; stir to combine.
* Scoop mounded tablespoonfuls of dough onto ungreased cookie sheets.  Flatten slightly with palm of hand.  Bake 9-10 minutes or until edges just begin to turn golden brown.  Let cool 1-2 minutes before transferring to wire cooling racks.

Food for Thought: The prudent see danger and take refuge, but the simple keep going and suffer for it. -Proverbs 27:12

Friday, June 28, 2013

Flashback Friday: Good Jumbo Raisin Cookies

Flashback Friday: Revisiting a recipe from long ago


These cookies more than make up for that disappointing Mock Angel Food cake I told you about last Friday.  I expected a rather plain and boring old-lady cookie full of nuts and raisins, but boy was I wrong.  Each lovely bite was soft and just a hint chewy, but not cakey.  You know, like all the goodness of a fresh, warm cookie....only they stayed that way even when they weren't straight out of the oven.  And believe me when I say I taste tested them at multiple stages; as dough, straight from the pan, cooled 5 min, cooled 10 min, 30 min later, 2 hours later, breakfast the next morning, within 20 seconds of walking in the door after work, and, well, you get the idea.  Not even possible to just eat one.

Friday, June 7, 2013

Flashback Friday: Colonial Date-Nut Bread

Flashback Friday: Revisiting a recipe from long ago

Everything about this recipe intrigued me, not to mention the fact that the recipe belonged to my great-grandma.   Hmmm, where to start?  I've heard of baking bread in cans but have never actually done it, that is until now.  When I asked my great-aunt about this recipe she explained the reasoning behind the cans, "to make the loaf round, of course."  Any other shape is apparently unthinkable.


I was more interested in the recipe method than the can aspect.  The first step of the recipe involves pouring boiling water over your dates, baking soda and butter.  I was puzzled by the concept of dissolving the baking soda in boiling water rather than adding it at the end with the dry ingredients.  Wouldn't it lose some of it's leavening power? Then again, the amount of soda is quite high for the amount of flour used, and there doesn't appear to be a whole lot of activating acidic ingredients.  Perhaps the soda is just there to help soften the dates.  Trusting my great-grandma's experience rather than my over-thinking-the-science perspective, I went ahead with the recipe.  But to be honest, I was half expecting a flop with that soapy baking soda aftertaste.


Fortunately these round slices have sweet date and vanilla flavors.  They also taste surprisingly buttery, especially considering the batter has only 2 tsp of butter.  For some reason I expected a pale bread studded with dates and nuts.  Instead the loaves turned a dark brown similar to a molasses bread.  These sweet, sticky loaves were most unusual, to say the least.  Though a little on the sweet side for me, it's not hard to see how the seeming unusual quickly turns to a usual treat.


Mother's Colonial Date-Nut Bread
recipe from my great-aunt, who got it from her mother, my great-grandmother

Ingredients:
1-1/2 cups dates, chopped
2 tsp baking soda
2 tsp butter
1 cup boiling water
1 cup sugar
1 egg
1 tsp vanilla
2 cups all-purpose flour
1/4 tsp salt
3/4 cup chopped nuts (I used walnuts)

Instructions:
* Preheat oven to 350 degrees F.  Grease 3 No. 2-1/2 cans**(see note below)
* To a large bowl add dates, baking soda and butter.  Pour in boiling water and let cool to lukewarm.
* Add sugar, egg and vanilla, mixing well. Stir in flour and salt then fold in nuts.  Pour into prepared cans and bake 50-60 minutes (or less if using smaller cans as described below).  Let stand in cans 5 minutes before turning out.  

**A No. 2-1/2 can holds approximately 3-1/2 cups and usually contains food weighing 27 to 29 ounces.  If you don't have 3 cans this size try replacing one or more cans with two 15-ounce cans each (also called No. 300 cans, these cans hold approximately 2 cups).  Reduce the baking time for the smaller cans.  I made half of a recipe and used one 28-ounce can and one 15-ounce can.


Food for Thought: "The two most engaging powers of an author are to make new things familiar, familiar things new." -William Makepeace Thackeray

Saturday, February 2, 2013

Flashback Friday: Soda Cracker Macaroon Pie

Flashback Friday: Revisiting a recipe from long ago

Still enamored with this vintage mixer, I decided to whip up some more egg whites.  I love how that mixer works.  Unlike my last mixer, it effortlessly transforms egg whites and sugar to stiff, snowy white peaks.  It's the little things that make me smile.  Anyway, this meringue acts as the base for a pie recipe belonging to my great-grandma.   The term pie is used loosely here as the dessert resembles a pie only in shape.


Crushed soda crackers, nuts and vanilla are folded into the fluffy white base and spread into a pie pan.  Great-Grandma Hattie folded in chopped dates for a little variety and usually served up a slice with whipped cream.  Her daughter, Carol (whose cookies we ate last week), wrote it is "excellent served with ice cream and chocolate syrup."